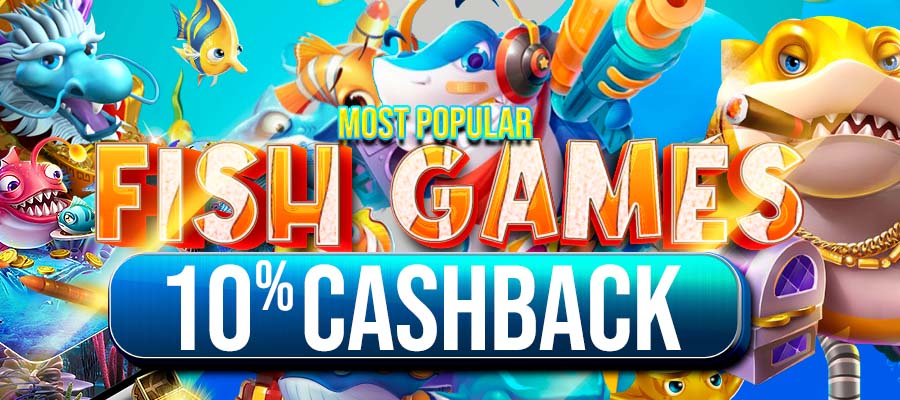
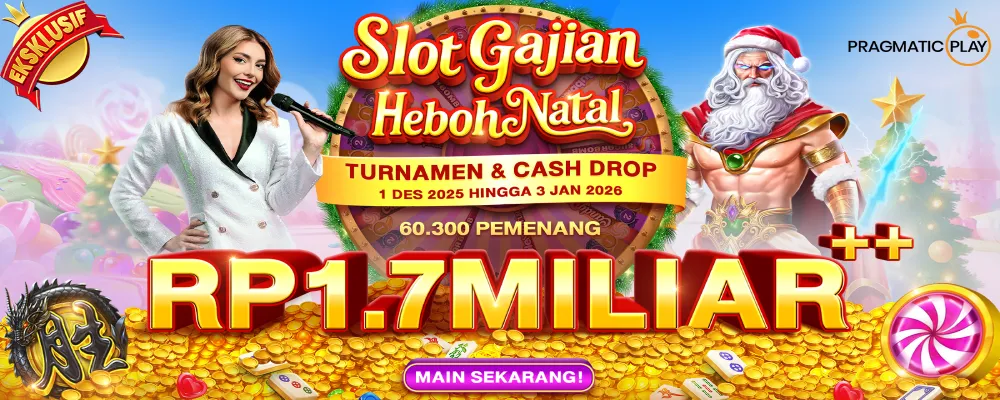
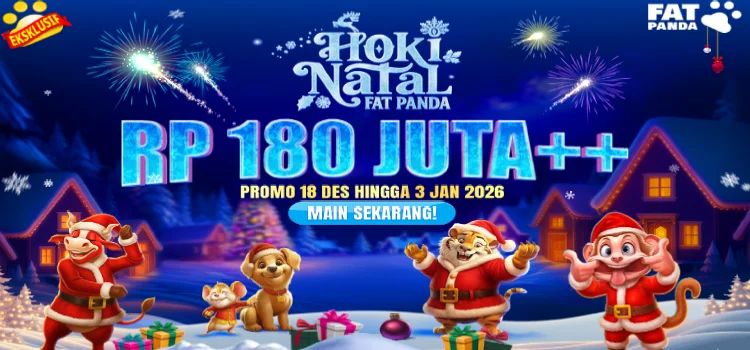
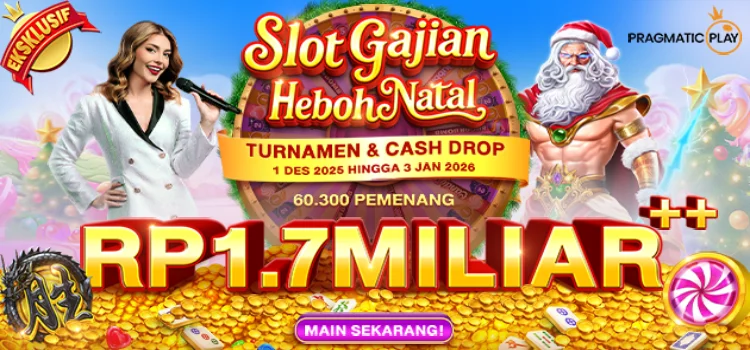
Enhancing Patient Care with AI Scribes

Artificial Intelligence (AI) is revolutionizing healthcare, and one of its most impactful applications is AI medical scribe technology. AI scribes improve patient care by reducing physician workload, increasing documentation accuracy, and allowing doctors to focus more on their patients. With advancements in natural language processing (NLP) and machine learning (ML), AI-powered scribes are transforming medical documentation, leading to better healthcare outcomes.

What is AI Scribe Technology?

AI scribe technology is a software-powered tool that listens to patient-physician interactions, transcribes them in real time, and integrates the structured notes into electronic health records (EHRs). Unlike traditional human scribes, AI scribes work autonomously or with minimal human intervention, reducing administrative burdens on healthcare professionals.

AI scribes can generate detailed medical notes, including:

  • Patient history and chief complaints
  • Physical examination findings
  • Diagnosis and treatment plans
  • Medication prescriptions and follow-up instructions

How AI Scribe Technology Improves Patient Care

Here is a list of improvements in patient care with AI Scribes 

1. Increased Doctor-Patient Interaction

Physicians often spend significant time typing notes or dictating records, which can reduce engagement with patients. AI scribe technology eliminates the need for manual documentation, allowing doctors to:

  • Maintain eye contact with patients
  • Engage in more meaningful conversations
  • Show greater empathy and attentiveness

This improves the patient care experience and fosters better doctor-patient relationships.

2. Reduced Physician Burnout

Studies show that physicians spend nearly 50% of their workday on documentation. The burden of paperwork contributes to burnout, which can lead to errors and lower-quality care. AI scribe technology reduces charting time, allowing doctors to:

  • See more patients without feeling overwhelmed
  • Have more energy to provide high-quality care
  • Improve work-life balance, leading to better long-term performance

3. Enhanced Accuracy and Efficiency

Manual documentation is prone to human errors such as omissions, misinterpretations, and inconsistencies. AI scribe technology uses advanced speech recognition and contextual analysis to:

  • Capture detailed and accurate patient notes
  • Structure information according to medical standards (SOAP notes, ICD-10 codes, etc.)
  • Reduce clerical errors that could affect patient care

This ensures comprehensive and reliable medical records, leading to better diagnoses and treatment decisions.

4. Faster and More Efficient Workflow

AI scribes integrate seamlessly with EHR systems, reducing administrative delays. This allows healthcare facilities to:

  • Reduce patient wait times
  • Improve clinic efficiency
  • Enhance overall hospital workflow

With faster documentation, medical staff can spend more time on patient care rather than paperwork.

5. Better Compliance and Data Security

AI scribe technology is designed to comply with healthcare regulations, ensuring data privacy and security. It follows:

  • HIPAA (Health Insurance Portability and Accountability Act) guidelines to protect patient information
  • GDPR (General Data Protection Regulation) for data protection in Europe
  • FDA and HITRUST standards for medical device and cybersecurity compliance

This ensures that patient records remain confidential while improving documentation quality.

Challenges and Considerations

Despite their benefits, AI scribe technology still requires:

  • Physician validation to ensure accuracy
  • Continuous learning to improve performance over time
  • Customization to fit different medical specialties

Healthcare providers must also choose reliable AI scribe solutions, such as Charting Hero, that align with their workflow and compliance requirements.

Conclusion

AI scribe technology is transforming patient care by enhancing physician efficiency, reducing burnout, improving documentation accuracy, and increasing doctor-patient interaction. By streamlining medical documentation, AI scribes allow healthcare professionals to focus on what matters most—providing high-quality patient care. As AI technology advances, its role in improving patient outcomes and healthcare efficiency will continue to grow.

Why a Versatile QD Mlok Sling Setup Can Improve Your Shooting Experience

If you’ve spent any time with a rifle — at the range, on the trail, or in a competition — you know that comfort, control, and convenience can make all the difference. One of the most overlooked upgrades for your firearm is your sling system. A versatile sling setup, like the SA-MC Sling Combo from Sylvan Arms (https://sylvanarms.com/), can significantly enhance your shooting experience by improving how you carry, deploy, and manage your firearm over time.

The Case for a Multi-Function Sling

Traditional slings generally fall into two categories: single-point and two-point. Each has its pros and cons. A single-point sling allows rapid transitions between shoulders and quick access to your firearm. Still, it can also leave your weapon dangling uncomfortably when not in use. Two-point slings offer better stability and weight distribution but can be less agile in dynamic situations.

The beauty of a hybrid setup like the SA-MC Sling Combo combines the best of both worlds. You can easily switch between single-point and two-point configurations depending on what you’re doing — walking long distances, standing at the range, or needing to react quickly to a moving target. This adaptability helps reduce fatigue and gives you greater control, no matter your environment.

Comfort Matters Over Time

Shooting isn’t always about high-octane moments. Sometimes, it’s about endurance — standing for long periods at a course or carrying your rifle during an outdoor trek. A good sling takes the strain off your arms and shoulders, letting you focus on your stance, aim, or surroundings. The SA-MC Sling Combo’s dynamic retention system and padded design make it easy to carry your rifle comfortably, even during extended sessions.

A versatile sling setup becomes even more beneficial for rifle builds that include a folding stock adapter. When the stock is folded for transport or compact storage, a well-positioned sling can offer quick deployment and stability without interfering with the adapter’s mechanism.

Flexibility Is Key

The SA-MC Sling Combo includes a QD Mlok Sling Attachment, which means you can reposition your sling mount to fit your preference. Whether you prefer a tight carry for better control or a looser setup for greater movement, this combo adapts to your needs. It’s also compatible with most M-LOK handguards, making it a practical addition to many modern rifle builds.

A Better Experience for Any Skill Level

You don’t have to be a tactical professional to benefit from a versatile sling system. Even casual or beginner shooters will notice the difference in balance, comfort, and control that a flexible sling setup provides. It helps reduce awkward movement and improves how your rifle feels over time — which can drastically improve your focus and enjoyment.

In short, upgrading your sling system is a smart, cost-effective way to get more out of your rifle. The SA-MC Sling Combo offers modern features, high durability, and ease of use, making it a smart choice when looking to elevate your shooting experience.

From Dated to Dazzling: A Creative Guide to Revamping Wood Paneling

From Dated to Dazzling: A Creative Guide to Revamping Wood Paneling

Mid-century homes were traditionally characterized by wood paneling, but it now provides an intriguing canvas for modern design. You may transform old walls into stunning, contemporary wood walls that enhance your entire house by imaginatively altering existing surfaces. This guide will assist you in transforming your room with confidence and flair, regardless of your preference for a clean, modern vibe or a cozy charm. Incorporating

wood paneling

is a great way to add depth and sophistication to any living space.

Why Modern Wood Walls Are a Design Game-Changer

There is more to modern wood walls than merely a fad. They add character, warmth, and depth without overpowering your décor. Wood, as opposed to drywall, adds visual interest and a natural texture, making it the perfect backdrop for practically any space. For a truly updated aesthetic, consider adding

modern design

to complement your modern wood walls.

Key Advantages of Modern Wood Walls

  • Blend well with a variety of styles, including minimalist, rustic, and industrial
  • Offer a timeless, natural look that enhances interior warmth
  • Can be painted, stained, or left raw for different moods
  • Increase home value through thoughtful and tasteful upgrades

Step-by-Step: Preparing Wood Paneling for a Fresh Look

Make sure the paneling is clean and prepared for transformation before you grab a paintbrush. To guarantee that your finish looks polished and lasts, this step is essential. Many designers recommend using

paint primer

to enhance the texture and warmth of interiors.

Cleaning and Smoothing

First, get rid of all the dust, grime, and dirt. Wipe the surface with a soft cloth and a basic solution of warm water and mild soap. After drying, look for any nail holes or cracks. After applying wood filler, lightly sand the entire surface. This improves paint adhesion and smooths the texture. Even if the paneling appears clean, do not omit this step.

Sealing and Priming

Use a premium primer that seals wood knots and prevents discoloration. This keeps the paint even and eliminates discoloration. Try to choose one made especially for wood surfaces. For clean, sharp edges, use painter’s tape to shield nearby walls, baseboards, and ceilings.

How to Paint for Stunning Modern Wood Walls

It’s time to realize your vision now that the paneling has been prepared. Whether your wood walls feel flat and old or new and modern depends on the type of paint and how it is applied.

Choosing the Right Paint

Apply a satin- or eggshell-finished latex wall paint. These sheens are durable without sacrificing their sleek, contemporary appearance. Consider neutral hues. Warm taupe, subtle green, creamy white, or soft gray are ideal for producing contemporary wood walls that seem timeless.

Pro Tips for Application

  • Cut in edges with a brush and roll the main sections with a high-density roller
  • Apply thin, even coats and allow each layer to dry completely
  • Consider using a paint sprayer for large rooms or smooth grooves
  • A second coat is almost always necessary for full coverage

Adding Style to Your Modern Wood Walls

Painting is only the first step. After your paneling has been modified, think about how to style it to maximize the use of your newly designed area.

Design Elements to Elevate Your Walls

  • Accent Lighting: Install sconces or LED strips to highlight the wood grain and texture
  • Wall Decor: Hang large-scale art or a gallery wall for a curated touch
  • Shelving: Floating wood or metal shelves pair beautifully with painted paneling
  • Plants: Add greenery to soften the lines and enhance organic appeal

Room-Specific Inspiration

  • Living Room: Create a statement wall behind the sofa with a deep charcoal or warm greige
  • Bedroom: Paint the wall behind the bed for a cozy focal point
  • Home Office: Use soft earth tones to foster calm and focus

Common Mistakes to Avoid

Despite the apparent ease of painting wood paneling, a few frequent mistakes can completely destroy the appearance of your contemporary wood walls. Digital marketing strategies can significantly boost visibility for home renovation businesses.

Avoid These Pitfalls

  • Skipping primer, which causes streaks and uneven tone
  • Using flat paint that highlights imperfections
  • Forgetting to caulk between panels, leaving visible seams
  • Applying thick coats that lead to drips or cracking

FAQ: Your Modern Wood Walls Questions Answered

Can I paint over dark or glossy wood paneling

Yes, but sanding and priming are essential. These steps help the new paint adhere properly and cover the original finish.

Do I need to remove wood paneling before painting

Not unless it’s damaged. Solid paneling in good shape can be painted directly after prepping.

What if I want a stained look instead of paint

You can sand and stain wood paneling for a natural effect. Choose a modern stain color like ash, walnut, or driftwood.

Can modern wood walls work in small rooms

Absolutely. Lighter colors and vertical panel lines can even make the space feel larger.

How do I clean painted wood paneling

Use a damp microfiber cloth with gentle soap. Avoid harsh scrubbing or abrasive products.

Which Carpet Cleaning Methods Are Best for Your Home?


Which Carpet Cleaning Methods Are Best for Your Home?

Keeping your carpet clean isn’t just about appearances—it’s a crucial part of maintaining a healthy home environment. But with various carpet cleaning methods available, homeowners are often left wondering which approach delivers the best results. Professionals often recommend

dry cleaning

for quick turnarounds without sacrificing results.

From deep-cleaning steam techniques to fast-drying dry processes, each method has its perks. This comprehensive guide explores the pros and cons, ideal use cases, and FAQs so you can make the most informed decision for your flooring.

A Quick Dive into Popular Carpet Cleaning Methods

Proper

carpet care

includes spot treatments, vacuuming, and professional cleaning. Before choosing the best approach for your home, it’s important to understand what each cleaning method entails.

Steam Cleaning (Hot Water Extraction)

This method injects hot water and cleaning solution deep into the carpet fibers, followed by immediate extraction. It’s ideal for removing embedded dirt, bacteria, and allergens.

Benefits:

  • Deep cleans carpet fibers
  • Effectively eliminates allergens and bacteria
  • Often recommended by carpet manufacturers

Drawbacks:

  • Requires long drying time (8–24 hours)
  • May cause mildew if over-saturated

Dry Carpet Cleaning

Dry cleaning methods use little to no water. A specialized compound or powder is spread over the carpet, attracting dirt and debris, then vacuumed away.

Benefits:

  • Carpets are ready for use within an hour
  • Perfect for moisture-sensitive spaces
  • Lower risk of mold and mildew

Drawbacks:

  • Provides only surface-level cleaning
  • Can leave behind residue if not done properly

Comparing the Methods: Which One Wins?

When evaluating carpet cleaning methods, context is everything. Here’s how they compare across different household needs.

For Allergy-Prone Households

If you or your family suffer from allergies, steam cleaning is the better choice. It reaches deep into the carpet to eliminate dust mites, pollen, and other allergens.

For Busy Households

Homes with a packed schedule may prefer dry cleaning due to the minimal downtime. You can walk on your carpets within minutes of finishing.

For Delicate Carpets

Natural fiber or antique carpets can be sensitive to moisture. Dry carpet cleaning methods reduce risk while still refreshing the fibers.

Additional Carpet Cleaning Methods to Consider

Beyond the popular steam and dry techniques, here are a few other carpet cleaning methods worth knowing about:

  • Bonnet Cleaning: A rotating pad absorbs dirt from the carpet surface. Best for commercial settings.
  • Encapsulation: Uses a cleaning foam that crystallizes into powder and is vacuumed up.
  • Shampooing: An older method where detergent is scrubbed into the carpet and rinsed out—less common due to longer drying times.

Carpet Maintenance Tips Between Cleanings

No matter which method you choose, regular care can keep your carpet in peak condition:

  • Vacuum at least twice a week
  • Blot spills immediately—don’t rub
  • Use doormats to reduce tracked-in dirt
  • Schedule professional cleanings every 6–12 months

Description List: How to Choose the Right Method

Here’s a quick reference guide to help match the right cleaning method to your needs:

Pet Owners Expect pet stains or hair? Go for steam cleaning. For households with pets, regular

steam cleaning

can help reduce lingering odors and allergens.

Apartment Dwellers Have limited space or poor ventilation? Dry cleaning is safer and faster.

Eco-Conscious Households Choose providers using non-toxic, biodegradable carpet cleaning methods.

Budget-Conscious Shoppers Encapsulation is often more affordable than steam cleaning, with decent results.

FAQs: Everything You Wanted to Ask About Carpet Cleaning Methods

Q: How often should I professionally clean my carpets? A: Every 6 to 12 months is standard, but high-traffic or pet-friendly homes may need more frequent cleanings.

Q: Is steam cleaning safe for all carpets? A: While effective, steam cleaning isn’t suitable for delicate fibers like wool or silk. Always check the manufacturer’s label.

Q: Does dry cleaning leave behind chemicals? A: Some dry carpet cleaning methods may leave a residue if not vacuumed thoroughly. Choose a reputable service that guarantees residue-free results.

Q: Can I use both methods on the same carpet? A: Yes. Some homeowners alternate between deep steam cleans and quick dry touch-ups to balance cleanliness and convenience.

Q: What method do professionals recommend most? A: Many pros recommend steam cleaning for its deep-reaching power and effectiveness against tough stains, especially in high-use areas.

Choosing the Best Method for Your Needs

There’s no universal answer when it comes to the best carpet cleaning methods. Your decision depends on your lifestyle, carpet type, and how quickly you need the carpet to be usable again. Steam cleaning offers a deeper clean, while dry cleaning provides speed and convenience.

Whichever method you choose, make it part of a consistent maintenance plan. Your carpet—and your lungs—will thank you.

Clean carpets open doors—effective online branding helps clients walk through them.

Inspiring Ideas for Using Trendy Carpets in Interior Design

Inspiring Ideas for Using Trendy Carpets in Interior Design


Carpets have evolved from simple floor coverings to essential elements that shape the ambiance and personality of any room. Choosing the right

floor coverings

can dramatically enhance the mood of your space. Whether you prefer bold statements or subtle accents, incorporating trendy carpets in interior design can transform your space into a cozy, stylish retreat. Below, discover how to choose, style, and maintain carpets that perfectly blend with your unique taste. Many carpet brands are now leveraging online tools to reach a broader audience.

The Foundation of Style: Choosing the Right Carpet

Before diving into patterns and textures, selecting the right size and placement is crucial for any trendy carpets in interior design project.

Size and Scale for Seamless Aesthetics

  • Living Rooms: Choose carpets large enough to anchor furniture arrangements. Ideally, front legs of sofas and chairs should rest on the carpet.
  • Dining Areas: Carpets should extend beyond the table to cover chairs when pulled out.
  • Bedrooms: Opt for a carpet that extends at least 18 inches beyond the bed’s edges for a luxurious, soft landing.

Placement Pointers

Proper placement enhances flow and balance. Misplaced carpets can break the visual harmony of a room, while well-positioned ones can create defined, cozy areas.

Infuse Personality: Color, Pattern, and Texture Tips

Trendy carpets in interior design offer an exciting opportunity to infuse color, pattern, and texture into your home. Always consider

carpet trends

when selecting carpets for high-traffic areas.

Color Choices that Resonate

  • Light Colors: Ideal for small spaces to create a spacious, airy feel.
  • Dark Tones: Add depth and intimacy to larger rooms.

Playing with Patterns

Introducing patterns can transform any dull space:

  • Neutral furnishings pair well with bold carpet patterns.
  • Patterned walls or furniture? Choose a subtle carpet to balance the look.

Textural Harmony

Mixing textures adds richness and a tactile element. Think plush carpets paired with sleek furniture or natural fibers blended with contemporary materials.

Practicality Meets Style: Durable and Easy-to-Maintain Carpets

Investing in quality

modern rugs

can extend the lifespan of your carpets. While beauty is essential, so is practicality.

Materials That Last

Choose materials that suit your lifestyle:

  • High-Traffic Areas: Nylon or wool blends offer durability.
  • Spill-Prone Zones: Stain-resistant carpets keep maintenance stress-free.

Maintenance Essentials

Maintain the charm of trendy carpets in interior design with these tips:

  • Vacuum regularly.
  • Address spills immediately.
  • Schedule professional cleanings periodically.

Design Depth: Mastering the Art of Carpet Layering

Layering carpets is a chic way to add depth and dimension to your décor.

Creative Layering Ideas

  • Base Rugs: Start with a large, neutral foundation rug.
  • Accent Rugs: Layer smaller, vibrant rugs on top for pops of color and pattern.
  • Texture Mixing: Combine flat-weave rugs with shaggy options for a dynamic feel.

Shape and Size Play

Experimenting with shapes—like placing a round rug atop a rectangular one—adds visual intrigue and breaks monotonous lines.

Complementing Design Elements

To fully integrate trendy carpets in interior design, consider how other décor pieces complement your carpet choice.

Furniture Coordination

Match carpet hues or patterns with throw pillows, curtains, or even wall art for a cohesive look.

Lighting Choices

Soft, warm lighting enhances the colors and textures of your carpet, creating a cozy ambiance.

Pro Styling Secrets for Carpets

Even professional designers follow tried-and-true tricks for styling trendy carpets in interior design:

  • Balance bold carpet choices with neutral walls.
  • Use rugs to delineate open-concept spaces.
  • Don’t be afraid to experiment with vintage or artisanal rugs for added character.

Quick Reference: Carpet Styling Checklist

  • [ ] Choose the right size and placement.
  • [ ] Coordinate colors with existing décor.
  • [ ] Play with patterns and textures.
  • [ ] Prioritize durable, low-maintenance materials.
  • [ ] Experiment with layering for added depth.

Glossary of Carpet Terms

Pile: The surface layer of a carpet, including looped or cut fibers. Flat-weave: A rug type without pile, offering a slim, durable profile. Tufting: The process of creating patterns or textures by inserting loops into the carpet backing. Backing: The material forming the base of a carpet, providing stability and strength.

FAQ: Trendy Carpets in Interior Design

Q1: How often should I replace my carpet to keep up with trends? Most quality carpets last 8–10 years. Update as needed to maintain both style and comfort.

Q2: Are layered carpets hard to maintain? No. Regular vacuuming and prompt spot cleaning keep layered rugs looking fresh.

Q3: Can trendy carpets work in minimalist designs? Absolutely. Choose simple patterns and neutral colors to align with minimalist aesthetics.

Q4: Are textured carpets harder to clean? Textured carpets may require more attention but offer unparalleled visual and tactile appeal.

Q5: What carpet materials are best for homes with pets? Opt for durable, stain-resistant materials like nylon or polyester blends.

The Silent Dangers of Overlooked Air Ducts and Why Cleaning Matters


The Silent Dangers of Overlooked Air Ducts and Why Cleaning Matters

Air ducts play a crucial role in your home’s ventilation system, ensuring the air circulates efficiently throughout the space. Yet, these hidden channels can harbor serious dangers when neglected. Over time, dust, debris, and even mold can accumulate inside your ducts, creating health risks, escalating energy costs, and even posing fire hazards. In Regular

hvac system

helps eliminate harmful particles that could otherwise degrade your indoor air quality.

Why Air Duct Cleaning Is More Important Than You Think

Air ducts are often out of sight and out of mind for many homeowners. However, regular air duct cleaning is crucial for maintaining a safe, efficient, and healthy home environment. The buildup of dust, allergens, and debris inside your ducts can affect both the indoor air quality and the overall performance of your HVAC system, just like a digital marketing strategy needs regular adjustments to maintain optimal performance and effectiveness.

Health Risks Linked to Dirty Air Ducts

When air ducts are neglected, harmful particles can be easily circulated through your home, leading to various health concerns.

Airborne Allergens: The Hidden Culprit

Dirty ducts are a breeding ground for allergens such as dust, pollen, and pet dander. These particles can trigger allergic reactions and worsen respiratory conditions like asthma. Cleaning your air ducts regularly helps prevent the spread of these irritants, making the air you breathe cleaner and healthier.

Mold Growth and Health Concerns

Moisture can seep into your ducts, promoting mold growth. Mold spores in the air can cause significant respiratory problems, including coughing, wheezing, and sinus issues. Regular air duct cleaning helps eliminate the conditions that promote mold, protecting your family from its harmful effects.

Bacteria and Viruses in the Air

In addition to allergens and mold, air ducts can also harbor bacteria and viruses. These pathogens can spread quickly throughout your home, particularly when your HVAC system is in use. Air duct cleaning helps remove bacteria-laden dust and debris, improving indoor air quality.

How Dirty Air Ducts Impact Your Wallet

Neglecting your air ducts can not only affect your health but can also be a drain on your finances. Here’s how regular air duct cleaning can save you money in the long run.

Increased Energy Bills

A buildup of dust and debris inside your ducts can restrict airflow, causing your HVAC system to work harder than necessary. This results in increased energy consumption and higher utility bills. By scheduling air duct cleaning, you can ensure your system operates efficiently, lowering energy costs.

Extended HVAC Lifespan

Over time, clogged air ducts can put additional strain on your HVAC system, leading to potential breakdowns and costly repairs. Keeping your air ducts clean reduces wear and tear on your system, extending its lifespan and saving you from expensive replacements.

Cleaner, More Efficient Heating and Cooling

When your air ducts are clogged, your heating and cooling system struggles to maintain consistent temperatures. By investing in regular air duct cleaning, you ensure that your HVAC system runs smoothly, providing better temperature regulation and comfort in your home.

Air Duct Cleaning: A Fire Safety Measure

It’s not just health and efficiency concerns that make air duct cleaning important; it’s also a critical step in preventing fire hazards.

Combustible Debris in the Ducts

Air ducts accumulate dust, lint, and other debris over time, which can pose a fire risk if these materials come into contact with a spark or malfunction in your HVAC system. Air duct cleaning helps eliminate this buildup, reducing the risk of a fire starting within your ducts.

Preventing Fire Spread

If a fire were to start within the HVAC system, clogged ducts can help the fire spread quickly throughout your home. Clean ducts allow your system to operate properly, minimizing the risk of fires spreading and giving you peace of mind that your home is safer.

Benefits of Regular Air Duct Inspections and Maintenance

To ensure that your air ducts remain in good condition, regular inspections and maintenance are essential.

  • Professional Cleaning: Professional

    air quality

    services often uncover hidden damage to ducts. This ensures thorough cleaning and removal of all contaminants.

  • Inspection for Leaks and Blockages: Professionals can identify leaks and blockages in your air ducts that could hinder airflow or increase energy consumption. Early detection can prevent costly repairs down the line.
  • Improved Air Quality: With regular inspections, you can keep your ducts free of contaminants, improving your home’s air quality and ensuring a healthier environment.

FAQ About Air Duct Cleaning

How often should I clean my air ducts?

It’s recommended to have your air ducts cleaned every 3 to 5 years. However, homes with pets, smokers, or those in dusty areas may need more frequent cleaning.

Can I clean my air ducts myself?

While basic maintenance like changing air filters can be done yourself, air duct cleaning requires specialized tools and knowledge. Hiring a professional ensures thorough and effective cleaning.

What are the signs that my air ducts need cleaning?

If you notice increased dust around your home, strange odors, or inconsistent airflow, it’s a good indication that your air ducts may need cleaning.

Is air duct cleaning worth the cost?

Yes, especially if you are dealing with health issues, higher utility bills, or efficiency problems. The benefits of improved air quality, energy savings, and fire safety make air duct cleaning a worthwhile investment.

Keep Your Home Safe with Regular Air Duct Cleaning

Air ducts play a crucial role in the overall health, safety, and efficiency of your home. Neglecting them can lead to significant risks, including poor air quality, increased energy bills, and even fire hazards. By scheduling

mold growth

, you can prevent costly HVAC repairs in the future. Don’t wait for problems to arise—invest in the health and safety of your home today.

Expert Guide: 5 Crucial Steps to Repair Water Damage Effectively


Expert Guide: 5 Crucial Steps to Repair Water Damage Effectively

Water damage is an alarming issue for any homeowner. From minor leaks to extensive flooding, water damage can rapidly deteriorate your home’s structure, damage personal belongings, and even pose health hazards like mold growth. Swift action and proper methods are essential for mitigating these risks. This comprehensive guide outlines crucial steps to tackle water damage effectively, helping you restore your home’s integrity, maintain its value, and ensure your family’s safety. To effectively manage severe

professional restoration

, immediate professional attention is essential.

Step 1: Quickly Locate and Address the Water Source

Identifying the exact source of water damage is your first priority. Quickly addressing the issue stops further harm and prevents secondary problems such as mold growth or structural weakening.

  • Check areas prone to leaks, including bathrooms, kitchens, basements, and roofs.
  • Look for signs like water stains, peeling paint, bubbling wallpaper, or sagging ceilings.
  • Immediately shut off the water supply to the affected area to prevent additional water ingress.

Common Sources of Household Water Damage:

  • Burst or leaking pipes
  • Faulty plumbing fixtures
  • Roof leaks
  • Appliance malfunctions (washing machines, dishwashers)

Step 2: Thoroughly Remove Damaged Drywall and Materials

Once you’ve controlled the leak, removing all water-damaged drywall and materials is crucial to prevent further issues. Proper cleanup ensures restoration will last longer and be more effective.

  • Protect flooring and furniture using drop cloths or plastic tarps.
  • Use appropriate safety equipment like gloves and masks when removing drywall.
  • Inspect carefully for hidden damage behind walls, under flooring, and ceilings.
  • Safely dispose of all affected materials to eliminate risks of contamination or mold.

Step 3: Replace, Repair, and Restore Affected Areas

After removal, accurately repairing the damaged areas restores structural integrity and appearance. Ensuring regular inspections can significantly reduce the risk of unexpected

pipe bursts

.

  • Measure and cut drywall patches slightly larger than the affected area.
  • Secure drywall with screws and apply joint compound to seal gaps.
  • Sand the area smoothly once dry, preparing it for painting.

Tips for Effective Drywall Repair:

  • Ensure patches overlap slightly with existing drywall for stability.
  • Always apply joint compound in thin layers, sanding between each for the best results.
  • Ensure the wall surface is completely smooth to avoid visible repair lines after painting.


Step 4: Prime and Paint for Lasting Protection

Priming and painting the repaired areas protect them from future water damage and enhance the appearance of your interiors. Prompt action and expert intervention can greatly mitigate extensive

home restoration

scenarios.

  • Apply a high-quality primer designed for moisture protection.
  • Use moisture-resistant paint, ideally applying two coats for best protection.
  • Allow adequate drying time between primer and paint coats to ensure durability.

Step 5: Comprehensive Cleanup and Maintenance

Effective cleanup following repairs prevents future issues and maintains your home environment.

  • Vacuum dust and debris thoroughly to prevent respiratory irritants.
  • Dispose of hazardous materials like paint or drywall responsibly.
  • Clean tools promptly after use and store them properly for future projects.

Additional Preventive Measures to Avoid Water Damage

Prevention is key to avoiding future water damage. Incorporating preventive strategies can safeguard your home significantly.

  • Regularly inspect plumbing, roofs, and appliance connections.
  • Install leak detection devices in high-risk areas.
  • Maintain proper ventilation and humidity control using fans or dehumidifiers.
  • Perform regular gutter and roof maintenance.

When to Seek Professional Restoration Services

Handling water damage can be overwhelming, particularly when extensive. Professionals ensure effective, thorough restoration.

  • Persistent leaks despite repeated DIY attempts.
  • Signs of mold or structural instability.
  • Significant flooding or extensive damage.

Benefits of Professional Water Damage Restoration:

  • Accurate assessment using specialized equipment.
  • Thorough drying and dehumidification techniques.
  • Effective mold prevention and remediation.
  • Peace of mind with guaranteed restoration quality.

For quick and reliable help, don’t hesitate to contact restoration experts today.

Frequently Asked Questions (FAQs)

What are the common signs of water damage?

  • Visible stains or discoloration
  • Musty odors
  • Mold or mildew
  • Sagging or soft spots in walls and ceilings

Can water damage be completely repaired?

Yes, water damage can typically be fully restored, especially when addressed quickly and properly, either through DIY efforts or professional restoration services.

Does homeowner’s insurance cover water damage?

Coverage varies significantly. Typically, accidental water damage from plumbing failures or appliance leaks may be covered, but issues caused by negligence or lack of maintenance usually are not. Always review your specific policy details.

How quickly should water damage be repaired?

Address water damage as soon as possible, ideally within 24-48 hours. Quick action minimizes damage and reduces the risk of mold growth.

If you’re in Acton and dealing with severe water damage, learn more about water damage restoration services in Acton offered by local professionals at 770 Water Damage & Restoration.

Start transforming your digital presence today by visiting us.

Stop the Drip: Expert Water Damage Restoration for Dripping Wall Problems


Stop the Drip: Expert Water Damage Restoration for Dripping Wall Problems

Water damage is one of the most distressing issues a homeowner can face—especially when it shows up as unexpected wet streaks running down your walls. These telltale signs, known as dripping wall problems, are not only unsightly but can also point to deeper structural and environmental concerns like mold infestations, wood rot, and compromised insulation. But don’t panic. With the right information, you can take control. If left unaddressed,

foundation crack

can lead to extensive structural deterioration over time.

Understanding Dripping Wall Problems: Causes and Consequences

What Are Dripping Wall Problems?

Dripping wall problems occur when water infiltrates your walls and causes moisture to become visible on the surface. This can result from:

  • Faulty plumbing: Leaky or burst pipes behind walls.
  • Roof leaks: Especially during or after heavy rainfall.
  • Poor insulation: Leading to condensation during temperature fluctuations.
  • Foundation cracks: Allowing groundwater to seep in.
  • Faulty HVAC systems: Causing humidity buildup indoors.

If not addressed promptly, these issues can evolve into expensive repairs and serious health risks due to mold and bacteria growth.

Why You Should Never Ignore the Signs

The appearance of water trails or damp spots can feel minor at first. But here’s what might follow:

  • Mold and mildew growth
  • Structural damage to drywall and wood framing
  • Increased utility bills from insulation degradation
  • Potential electrical hazards
  • Persistent odors and air quality issues


The Ultimate Restoration Process for Dripping Wall Problems

Step-by-Step Restoration Strategy

Addressing dripping wall problems requires a structured plan. Here’s a detailed walkthrough:

  1. Initial Inspection
    Examine the area carefully. Look for water stains, bubbled paint, soft drywall, or a musty smell. Take photos for insurance purposes.
  2. Pinpoint the Source
    Determine whether it’s a pipe leak, roof issue, condensation, or something else. If unsure, hire a water damage specialist to inspect using moisture meters or thermal imaging.
  3. Stop the Flow Immediately
    Shut off the water supply if it’s plumbing-related. Use tarps or sealants for roof leaks temporarily. The goal is to halt further damage.
  4. Remove Saturated Materials
    Take out any soaked insulation, drywall, wallpaper, or carpet that’s been affected. These materials can harbor mold and won’t dry properly.
  5. Dry Everything Thoroughly
    Use industrial fans, dehumidifiers, and open windows. Consider renting professional-grade drying equipment if the affected area is large.
  6. Clean and Disinfect
    Scrub all surfaces using an antimicrobial solution. This helps eliminate mold spores and other harmful microbes.
  7. Repair and Rebuild
    Replace drywall, repaint walls, install new insulation, and restore any removed fixtures. Ensure all repairs are mold-resistant.

Restoration Tip:

Even after repairs, keep an eye on the area for weeks to ensure there are no recurring signs of dripping wall problems. Ignoring early signs of

roof leaks

may result in mold infestations and air quality issues.

Common Homeowner Concerns About Water Damage Restoration

1. How Much Will This Cost?

The cost of addressing dripping wall problems varies:

  • Minor repairs: $200–$600
  • Moderate damage: $1,000–$2,500
  • Major restoration: $5,000 or more

Factors include the source, materials affected, and whether mold remediation is needed.

2. Is This Covered by Insurance?

It depends on your policy and the cause:

  • Covered: Sudden pipe bursts or storm damage
  • Not covered: Gradual leaks or poor maintenance

Always contact your insurer and review your homeowners policy for clarity.

3. How Long Does Restoration Take?

  • Light damage: 1–3 days
  • Moderate repairs: Up to a week
  • Severe situations: 2–3 weeks or longer

Drying and mold testing may add time to the overall process.

Should You DIY or Call the Pros?

DIY Water Damage Fixes

✅ Suitable for small areas
✅ Lower cost
✅ Empowering for handy homeowners

However, DIY fixes come with risks like:

  • Missed moisture (leading to mold)
  • Inadequate drying
  • Unprofessional repairs

When to Hire Professionals

  • Large-scale damage
  • Recurring leaks
  • Mold is already present
  • Insurance claim assistance needed

Professionals use tools like infrared sensors, air scrubbers, and commercial dryers to ensure a thorough restoration. Post-restoration care should always include routine

burst pipes

to ensure lasting results.

Prevention is Key: How to Keep Dripping Wall Problems Away

Stay Ahead with These Preventative Strategies

Implementing these habits can save you thousands:

  • Inspect Plumbing Annually: Look under sinks, behind toilets, and near appliances.
  • Maintain Gutters and Downspouts: Prevent overflow near your foundation.
  • Check Windows and Doors: Seal cracks and ensure proper flashing.
  • Insulate Walls: Prevent condensation in high-humidity areas.
  • Use a Humidistat: Keep indoor humidity below 60%.
  • Grade Your Yard Properly: Direct water away from your home’s perimeter.

Real-Life Story: Emma’s Water Damage Win

Emma, a homeowner in a storm-prone region, returned home after a heavy downpour to find her wall soaked. Her dripping wall problems stemmed from a tiny crack in her foundation.

Here’s how Emma tackled the issue:

  1. Identified the source with the help of a pro.
  2. Removed all water-damaged materials.
  3. Used commercial dryers and monitored humidity for 5 days.
  4. Sealed the foundation crack with epoxy.
  5. Installed French drains to divert future water.

Today, Emma enjoys a dry, mold-free living space—all because she acted fast and smart.

FAQs About Dripping Wall Problems

How can I detect dripping wall problems early?

Look for stains, warped paint, damp smells, or cold patches. Use moisture meters for hidden leaks.

Can dripping wall problems damage my foundation?

Yes. Persistent moisture can weaken foundation walls, especially in older homes.

What kind of mold grows behind dripping walls?

Common species include AspergillusPenicillium, and Stachybotrys (black mold), which can cause serious health issues.

How often should I check for wall moisture?

Do a quick inspection every 2–3 months, especially during rainy seasons.

Can I repaint over a water-damaged wall?

Only after it’s completely dry and treated. Otherwise, the moisture will resurface and damage the paint again.

Conclusion: Take Control Before the Damage Spreads

Dripping wall problems aren’t just cosmetic—they’re a flashing red warning sign of deeper water damage issues. By acting quickly, understanding the process, and choosing the right help, you can restore your walls and peace of mind.

Whether you take the DIY route or hire a professional, staying informed and proactive is the key to prevention and long-term home health.

Whether you’re a startup or a growing enterprise, we have solutions that fit your needs.

Stay Cool and Breathe Clean: The Power of Professional AC Cleaning Services


Stay Cool and Breathe Clean: The Power of Professional AC Cleaning Services

Why Your AC Deserves More Than a Quick Dust-Off

It’s Not Just About Cold Air

An air conditioner is more than a machine that cools your home. It’s a system that filters, circulates, and maintains the quality of the air you breathe daily. Regular

indoor comfort

is essential to maintain peak performance and prevent system failures. This is where professional AC cleaning services step in to protect your health and enhance the performance of your cooling system.

DIY Isn’t Always Enough

You can replace filters or vacuum vents, but deep-seated grime, mold inside coils, and bacteria hiding in ducts require expert attention. AC cleaning services offer thorough and precise treatments that improve air quality and system longevity far beyond DIY capabilities.

The Real Benefits of AC Cleaning Services

Breathing Easier Indoors

Your AC system pulls in outside air, which is filled with particles like pollen, pet dander, and dust. Without professional maintenance, these contaminants accumulate. Regular AC cleaning services eliminate allergens, making your indoor environment safer, especially for those with asthma or allergies.

Saving Energy and Cutting Costs

A dirty AC unit works harder to cool your home, leading to increased energy bills. Clean systems operate efficiently, using less power to deliver better results. This means AC cleaning services can reduce your monthly energy expenses while lowering your carbon footprint.

Boosting Equipment Lifespan

Routine cleaning keeps your AC components running smoothly. Removing dirt and grime minimizes wear and tear, preventing breakdowns. Investing in AC cleaning services now can save you from costly replacements in the future.

Keeping Mold and Mildew at Bay

Air conditioners can become breeding grounds for mold, especially when moisture builds up inside the unit. AC cleaning services include cleaning and drying key components to prevent dangerous mold growth, protecting both your health and your home. Clean, healthy air starts with dependable

air quality

from experienced professionals.

Consistent Cooling, No Hot Spots

When your AC is clean, airflow is balanced throughout your home. AC cleaning services help eliminate uneven cooling and make your entire living space more comfortable, even during the hottest days of summer.

Protecting Your Warranty

Many AC manufacturers require proof of routine maintenance to keep the warranty valid. AC cleaning services provide the documentation and assurance you need to stay covered in case of equipment failure.

No More Surprise Breakdowns

Professionals can spot issues before they become problems. Regular inspections and AC cleaning services can prevent mid-summer meltdowns when you need your system the most.

More Reasons to Choose AC Cleaning Services

  • Peace of Mind: Know your system is clean and efficient.
  • Better Smelling Air: Eliminate musty odors from mold and dust.
  • Fewer Repairs: Avoid common issues like frozen coils and clogged drains.
  • Healthier Family: Reduce the risk of respiratory issues and infections.

What Happens During a Professional AC Cleaning?

Step-by-Step Service Description

  • Inspection: Technicians check filters, coils, blowers, and ductwork.
  • Deep Cleaning: Using professional-grade tools, they clean evaporator and condenser coils, blower fans, and drain pans.
  • Mold Treatment: If needed, anti-microbial treatments are applied.
  • Airflow Testing: They ensure proper airflow throughout your home.
  • Performance Testing: The system is tested to ensure optimal function.

Quick Reference: AC Cleaning Service Breakdown

Common Components Cleaned:

  • Air filters
  • Evaporator coils
  • Condenser coils
  • Fan blades
  • Drain pans
  • Air ducts

Common Tools Used:

  • Coil brushes
  • HEPA vacuums
  • Anti-fungal sprays
  • Steam cleaners

Recommended Frequency:

  • Once every 6 to 12 months

FAQ: Everything You Need to Know About AC Cleaning Services

How often should I schedule AC cleaning services? Every 6 to 12 months, depending on usage, local climate, and household conditions like pets or smokers.

Will cleaning my AC unit lower my energy bills? Yes. Clean systems run more efficiently and use less energy to cool your home.

Can AC cleaning improve indoor air quality? Absolutely. It removes dust, pollen, and mold that would otherwise circulate through your air.

What signs indicate my AC needs cleaning? Unpleasant odors, weak airflow, unusual noises, and increased energy bills are all red flags.

Do all HVAC companies offer the same level of service? No. Look for companies that specialize in detailed AC cleaning services and have strong reviews and certifications.

Cleaner Air, Cooler Home

Don’t wait until your AC breaks down or starts blowing musty air. AC cleaning services are essential to keeping your system efficient, your air breathable, and your energy bills manageable. Investing in routine

energy efficiency

helps protect your family from airborne contaminants. Make regular maintenance a part of your routine and enjoy a healthier, more comfortable home year-round, and let effective digital marketing help you stay ahead by connecting you with trusted local experts.

Carpet Steam Cleaning vs Shampooing: The Ultimate Carpet Care Faceoff

Carpet Steam Cleaning vs Shampooing: The Ultimate Carpet Care Faceoff


Regular

deep cleaning

routines can significantly extend the life of your flooring. Choosing the right carpet cleaning method can transform your living space from tired and dingy to fresh and vibrant. But with options like carpet steam cleaning and shampooing available, which method truly wins? Let’s break it down creatively and clearly, helping you make the best decision for your home’s health and beauty.

The Basics: What Is Carpet Steam Cleaning and Shampooing?

Understanding the basics of

carpet care

can help you maintain a healthier home. Both methods aim to revive your carpets, but they differ significantly in process and results.

Carpet Steam Cleaning Explained

Carpet steam cleaning, often called hot water extraction, uses high-temperature vapor to penetrate deep into carpet fibers. It dislodges dirt, allergens, and bacteria before powerful suction removes it all, leaving minimal residue behind.

Carpet Shampooing Explained

Carpet shampooing involves applying a chemical-laden foam, scrubbing it into the carpet, and then extracting it. This method focuses more on surface-level dirt and visible stains but often leaves behind residues that can attract future dirt.

How Each Method Works: A Deeper Dive

Understanding the process helps you appreciate why one method might suit your needs better. Even high-traffic areas can look new again with thorough

steam cleaning

treatments.

Carpet Steam Cleaning:

  • Hot water is sprayed at high pressure.
  • Dirt, bacteria, and allergens are loosened.
  • The dirty water is extracted almost immediately.

Carpet Shampooing:

  • Detergent-based foam is applied.
  • A rotary machine agitates the carpet.
  • Foam and dirt are vacuumed up but some residue often remains.

Pros and Cons at a Glance

Why Choose Carpet Steam Cleaning?

  • Deeply cleans carpets and removes allergens
  • Uses minimal chemicals for a healthier home
  • Faster drying times compared to shampooing
  • Extends carpet life significantly

Why Choose Carpet Shampooing?

  • Effective for extremely dirty or stained carpets
  • Quick surface refresh when deep cleaning isn’t necessary
  • Often available at a lower upfront cost

However, carpet steam cleaning remains the top choice for lasting results and cleaner, healthier homes.

Comparing Results: Steam Cleaning vs Shampooing

Let’s take a closer look at how each method stacks up based on important cleaning factors.

  • Deep Cleaning Effectiveness: Carpet steam cleaning wins
  • Surface Stain Removal: Shampooing is strong but short-lived
  • Drying Time: Carpet steam cleaning dries faster
  • Residue Left Behind: Carpet shampooing often leaves sticky residues
  • Chemical Use: Carpet steam cleaning uses less

Clearly, carpet steam cleaning offers a more thorough and eco-friendly solution.

When to Opt for Carpet Steam Cleaning

There are specific times when carpet steam cleaning makes the most sense for your home.

  • Seasonal deep cleaning to remove allergens
  • After pet accidents or odor issues
  • Preparing a home for sale
  • Post-event cleanup after parties or gatherings
  • Regular maintenance every 6-12 months

Carpet steam cleaning revitalizes your floors and promotes a healthier living environment.

When Shampooing Might Make Sense

While carpet steam cleaning often takes the crown, shampooing still has its place.

  • Extremely heavy, visible staining
  • Very old carpets needing surface improvement
  • Low-budget quick fixes before carpet replacement

Still, even then, carpet steam cleaning afterward ensures deep sanitation and better long-term results.

Unordered List: Key Benefits of Carpet Steam Cleaning

Here’s why carpet steam cleaning is the smarter choice:

  • Penetrates deep into fibers
  • Removes allergens, dust mites, and bacteria
  • Minimal chemical residues
  • Faster drying times
  • Prolongs carpet lifespan
  • Eco-friendly method
  • Fresh, odor-free carpets
  • Helps maintain carpet warranties
  • Ideal for sensitive households
  • Leaves carpets looking brand-new

Description List: Key Terminology

Hot Water Extraction:
The technical term for carpet steam cleaning, involving high-pressure steam and suction.

Residue:
Leftover chemical or dirt particles that remain after cleaning, leading to rapid resoiling.

Agitation:
Mechanical action used during shampooing to scrub the carpet fibers.

Extraction:
The process of sucking up moisture and loosened dirt during carpet steam cleaning.

FAQ: Carpet Steam Cleaning vs Shampooing

What is the main difference between carpet steam cleaning and shampooing?

Carpet steam cleaning uses hot water vapor to deep clean fibers with minimal chemicals, while shampooing applies a foamy detergent for surface cleaning.

Is carpet steam cleaning safe for all types of carpets?

Yes, most modern carpets are designed to handle carpet steam cleaning. Always check manufacturer guidelines.

How often should I schedule carpet steam cleaning?

It’s recommended to schedule carpet steam cleaning every 6-12 months depending on foot traffic and household conditions.

Can carpet steam cleaning remove old stains?

Carpet steam cleaning is highly effective at removing older stains, especially when paired with spot treatments.

Does shampooing leave carpets wet longer than steam cleaning?

Yes, carpets cleaned with shampooing typically take longer to dry compared to those cleaned with carpet steam cleaning.

Roadside Heroes: The True Value of Professional Towing Services


Roadside Heroes: The True Value of Professional Towing Services

When Trouble Strikes: Why You Need More Than a Tow Truck

Breaking down on a busy highway or remote road can quickly turn a simple drive into a stressful experience. In these moments, Professional Towing Services are more than just a convenience—they’re a lifeline. From minor roadside hiccups to major mechanical failures, reliable towing providers ensure your safety, reduce vehicle damage, and get you back on track fast. A reliable towing service can make all the difference after a

vehicle breakdown

.

What Sets Professional Towing Services Apart?

Not all towing companies are created equal. What distinguishes professional services is their commitment to safety, efficiency, and total roadside support.

Rapid Response When It Matters Most

Timing is everything when your car won’t start or you’ve been in an accident. Professional Towing Services operate with speed and urgency, responding to calls 24/7. Their goal is simple: minimize your stress and maximize your safety.

Skilled Teams and Specialized Equipment

Professionals don’t rely on guesswork. They bring:

  • Licensed and trained tow truck operators
  • A fleet of flatbeds, wheel-lifts, and heavy-duty wreckers
  • Equipment for handling motorcycles, luxury vehicles, and commercial fleets

Whether you’re dealing with a locked-in key or a flipped SUV, they’ve got the tools and know-how.

More Than Just a Tow

Modern Professional Towing Services often include comprehensive roadside assistance, such as:

  • Battery jump-starts
  • Fuel delivery
  • Flat tire changes
  • Lockout solutions

This means you might not need a tow at all—just expert help on the spot.

Hidden Perks You Didn’t Know Towing Services Offer

Reliable towing companies offer more than just mechanical help. They deliver real peace of mind in unpredictable situations.

24/7 Availability

Breakdowns don’t wait for business hours. With Professional Towing Services offering 24/7 support, you’re never alone—day or night, weekday or weekend.

Keeping Roads Safer

Stranded vehicles cause traffic jams and accidents. Towing crews help by:

  • Clearing wrecks and disabled vehicles quickly
  • Assisting law enforcement at accident scenes
  • Supporting emergency responders

Their work protects not just you, but every driver around you.

Insurance and Licensing Protection

Choosing a licensed, insured towing company means you’re protected from:

  • Accidental damage during loading and towing
  • Liability issues in the event of an incident
  • Unethical practices or hidden fees

Always verify credentials before handing over your keys. Your insurance policy might already include

road safety

at no extra cost.

How to Choose the Right Professional Towing Services

Making the right choice can save you time, money, and stress. Understanding your coverage for

emergency towing

is just as important as choosing the right provider. Here’s what to look for:

Do Your Homework

Check for:

  • Verified customer reviews
  • Local recommendations
  • Company website with clear services listed

Understand What’s Included

Not all tows cost the same. A professional service should offer:

Description List:

Flat Rates – Transparent pricing for basic towing Mileage Costs – Clear cost per mile if you’re far from a drop-off Additional Services – Battery boosts, tire swaps, or fuel delivery

Confirm Certifications and Coverage

Ask about:

  • Business licensing and insurance
  • Certifications for specialty towing
  • ETA commitments during emergencies

What You Might Be Wondering (FAQ)

Q: How fast can professional towing services reach me? A: Most reputable providers aim to arrive within 30 to 60 minutes, depending on your location and traffic conditions.

Q: Are towing fees covered by car insurance? A: Many comprehensive policies include roadside assistance. Contact your insurer to confirm or ask your towing company if they accept direct billing.

Q: Can professional towing services handle electric vehicles or luxury cars? A: Absolutely. Most top-tier services have equipment designed for low-clearance, high-value, or electric vehicles to prevent damage.

Q: Do I need to be present during the tow? A: In most cases, yes. However, some providers may accept remote authorization with digital paperwork, especially if you’re unavailable.

Q: How do I avoid towing scams? A: Always choose licensed and insured providers. Avoid unsolicited tows at accident scenes and confirm prices before service.

Final Thoughts: Roadside Peace of Mind Starts Here

Whether you’re stuck with a dead battery, flat tire, or worse, Professional Towing Services offers peace of mind when the road turns unpredictable. With skilled teams, 24/7 availability, and full-service support, they’re not just rescuers—they’re your trusted partners in transportation.

Don’t wait until you’re stranded on the side of the road to start searching for help. Breakdowns and emergencies can happen when you least expect them, and the last thing you want is to be caught off guard. Save the number of a reputable towing company in your phone now, so you’re prepared when trouble strikes. Having reliable assistance just a call away can save you time, stress, and hassle. Trust us—you’ll thank yourself later for being ready. Hiring a towing company is a wise decision to have your car towed with the help of professionals.

Breathe New Life Into Your Floors With Natural Carpet Cleaning

Breathe New Life Into Your Floors With Natural Carpet Cleaning


Carpets do more than decorate our homes — they collect memories, cozy moments, and, unfortunately, dirt. Keeping your carpets fresh shouldn’t expose your family to harsh chemicals. That’s where natural carpet cleaning comes in. Choosing

steam cleaning

options ensures your carpets stay fresh without harming the environment. This method blends eco-consciousness with high performance, delivering sparkling clean carpets without the toxic aftermath.

Let’s dive into why natural carpet cleaning is revolutionizing how we care for our homes and how you can make the switch easily.

Why Natural Carpet Cleaning Is the Smart Choice for Every Home

Choosing natural carpet cleaning is not just a trendy move — it’s a commitment to healthier living and a greener planet.

Protect Your Family’s Health the Natural Way

Standard carpet cleaners are often loaded with harmful ingredients that can aggravate allergies, asthma, and skin sensitivities. In contrast, natural carpet cleaning relies on non-toxic agents and techniques, leaving your home fresh and your air safe to breathe.

Love the Planet While Loving Your Home

Many homeowners now prefer

natural carpet cleaning

to maintain a healthier indoor atmosphere. By using natural carpet cleaning methods, you contribute to environmental conservation. Green products are biodegradable and manufacturing processes are typically less polluting, helping to shrink your carbon footprint.

Achieve Deep, Lasting Clean Without the Chemicals

Modern steam vapor systems and plant-based solutions make natural carpet cleaning just as powerful as traditional methods. They remove grime, allergens, and bacteria without leaving behind hazardous residues.

Powerful Techniques for Natural Carpet Cleaning You’ll Love

When tackling stubborn stains, rely on

green products

that are gentle yet effective. You don’t need a chemical arsenal to get spotless carpets. Here are some powerful methods embraced by experts in natural carpet cleaning:

Steam Vapor Cleaning: Nature’s Cleaning Power

One of the most effective techniques is steam vapor cleaning. Here’s why it’s so highly recommended:

  • High Heat: Destroys germs and allergens on contact
  • Minimal Water: Reduces mold risk and shortens drying times
  • Zero Chemicals: Only natural heat and water vapor at work

DIY Natural Carpet Cleaning Solutions That Work Wonders

Some of the best natural carpet cleaners can be found right in your kitchen:

  • Vinegar Solution: Mix equal parts white vinegar and water to treat stains naturally.
  • Baking Soda Magic: Sprinkle baking soda to neutralize odors before vacuuming.
  • Essential Oil Boost: Add a few drops of lavender or lemon oil to your homemade cleaner for a fresh scent.

Routine Care for Naturally Beautiful Carpets

Maintaining a fresh carpet naturally involves:

  • Frequent Vacuuming: Use a vacuum with a HEPA filter to trap allergens.
  • Immediate Spot Treatment: Address spills quickly with natural spot cleaners.
  • Seasonal Deep Cleans: Schedule steam vapor cleanings several times a year.

Key Features to Look For in a Natural Carpet Cleaning System

Before choosing your next carpet cleaner, consider these eco-friendly features:

  • High-Temperature Output: Look for systems that produce vapor above 200°F for optimal sanitization.
  • Dry Vapor Technology: Choose equipment that leaves minimal moisture behind.
  • Eco Certifications: Select machines and products certified by organizations like Green Seal.

Eco-Friendly Ingredients Commonly Used in Natural Carpet Cleaning

Here’s a quick guide to some common heroes behind natural carpet cleaning:

Baking Soda
Absorbs odors and gently scrubs away dirt

White Vinegar
Breaks down stains and eliminates bacteria

Essential Oils
Adds pleasant natural fragrances and mild antibacterial properties

Plant-Based Surfactants
Derived from plants like coconut, they lift dirt without harming the environment

Quick Tips for Natural Carpet Cleaning Success

Want the best results from your natural approach? Keep these simple tips in mind:

  • Always do a spot test before applying any cleaner widely
  • Ventilate the area well after steam cleaning
  • Rotate furniture to avoid permanent dents
  • Groom carpets with a brush after cleaning for a fresh look

Frequently Asked Questions About Natural Carpet Cleaning

What Is Natural Carpet Cleaning?

Natural carpet cleaning refers to techniques and products that avoid synthetic chemicals. Instead, it uses eco-friendly methods like steam vapor and plant-based solutions to clean carpets safely and effectively.

Is Natural Carpet Cleaning Safe for Pets and Children?

Absolutely! Since natural carpet cleaning eliminates toxic residues, it creates a safer surface for pets and kids to crawl and play on.

Can Natural Carpet Cleaning Remove Tough Stains?

Yes! While it may require a little extra effort, combining heat, natural ingredients, and prompt action can tackle even stubborn stains without chemicals.

How Often Should I Use Natural Carpet Cleaning Methods?

For most homes, a thorough natural carpet cleaning every 6 to 12 months, along with regular maintenance, keeps carpets looking and smelling fresh.

Clean Smarter With Natural Carpet Cleaning

Switching to natural carpet cleaning isn’t just a feel-good move — it’s a smart investment in your health, your home’s longevity, and the planet’s future. Whether you’re treating stains, refreshing high-traffic areas, or deep cleaning entire rooms, eco-friendly methods deliver the results you want without compromise.

Growing a professional carpet cleaning service today requires smart online marketing to stay competitive. Make the natural choice today, and experience the pure, simple joy of a truly clean home.

Maximizing Range Performance with the Sylvan Arms Sig P320 Conversion Block

The Sylvan Arms (https://sylvanarms.com/) Sig P320 Conversion Block is a highly sought-after accessory among firearm enthusiasts looking to expand their shooting versatility. Whether you’re a competitive shooter, a tactical professional, or a recreational user, this conversion block can significantly enhance your range experience. 

Here’s how it improves shooting precision, training versatility, overall performance, and practical tips to help you get the most from this upgrade.

1. Improve Shooting Precision

The Sig P320 Conversion Block is engineered for precision. It provides a more stable shooting platform by enabling compatibility with various platforms, such as pistol-to-carbine conversionsmaximize. The added stability reduces muzzle rise, increases control, and allows shooters to maintain better sight alignment and sight picture. As a result, users often notice tighter groupings and more consistent shot placement at varying distances.

To fully capitalize on this precision boost, it’s essential to dedicate time to refining your shooting fundamentals. Focus on proper stance, grip, trigger control, and follow-through. Incorporating dry-fire drills and live-fire exercises will help reinforce muscle memory and make the most of the conversion block’s capabilities.

2. Expand Training Versatility

One of the standout benefits of the Sylvan Arms Sig P320 Conversion Block is its ability to transform your pistol into a multi-platform training tool. Whether you’re practicing for competition, personal defense, or law enforcement scenarios, the conversion block allows you to simulate different environments without needing a full arsenal of firearms.

For example, you can easily switch between pistol and carbine configurations, adapting your training to cover both close-quarters and intermediate-range engagements. Pairing the conversion block with a compatible folding stock adapter (e.g., installing your P320 fire control group into an AR lower receiverfurther enhances versatility, allowing you to collapse the stock for compact storage or deploy it for added shoulder support and stability when needed. This setup not only boosts control and recoil management but also makes it easier to transport your firearm to and from the range.

This versatility helps develop a well-rounded skill set, improves weapon manipulation, and enhances adaptability under pressure. It also allows you to practice with one core firearm platform, reducing the learning curve and maximizing training efficiency.

3. Enhance Overall Range Experience

At the range, the conversion block delivers both performance and enjoyment. The ability to switch between configurations keeps range sessions dynamic and engaging. Shooters can alternate between drills focused on accuracy, speed, and tactical movement, all with the same base firearm.

The increased platform stability also translates to reduced recoil fatigue over extended sessions, allowing shooters to train longer without sacrificing control or comfort. Additionally, using the conversion block can extend the lifespan of your primary pistol by spreading wear and tear across multiple configurations and reducing the strain on core components.

4. Optimize Ammunition Use

Another practical advantage is the ability to test and optimize different types of ammunition. Whether you’re working with target loads, defensive rounds, or specialty ammo, the conversion block allows you to assess performance across platforms. Documenting your results helps identify the best combinations for accuracy, reliability, and recoil management.

5. Prioritize Safety and Maintenance

As with any firearm upgrade, safety and maintenance are critical. Before heading to the range, ensure the conversion block is properly installed and all components are secure. Perform a thorough function check, including verifying smooth cycling and trigger operation. At the range, periodically inspect the block and firearm for signs of wear, and address any issues promptly.

Regular maintenance will also maximize performance. Clean the conversion block after each use, paying close attention to any buildup or debris that could affect function. Applying appropriate lubrication to moving parts will keep your setup running smoothly.

Final Thoughts

The Sylvan Arms Sig P320 Conversion Block is more than just an accessory—it’s a powerful tool for elevating your shooting experience. Improving precision, expanding training options, and making range time more enjoyable and productive help shooters of all levels push their skills to the next level. With proper preparation, practice, and care, this conversion block can become an essential part of your firearms toolkit, helping you get the most from every round fired.

Breathe Easy: The Ultimate Guide to Chimney Cleaning for a Safer, Warmer Home

Why Chimney Cleaning Should Be a Priority

A clean chimney isn’t just about keeping your fireplace running smoothly—it’s a critical part of home safety. Every time you burn wood, especially unseasoned or softwood, it releases smoke filled with fine particles and gases. As this smoke rises through the cooler chimney, it condenses and forms creosote, a sticky, tar-like substance that clings to the interior walls of your flue. Creosote is not only stubborn and difficult to remove, but also highly flammable. When it builds up in thick layers, even a small spark or high heat from a fire can ignite it, leading to a dangerous chimney fire that can spread quickly to other parts of your home. Ignoring chimney maintenance doesn’t just reduce your fireplace’s performance—it puts your entire household at risk. To reduce the risk of fire, make sure your

soot removal

is performed at least once a year.

Regular chimney cleaning:

  • Prevents chimney fires
  • Improves air quality
  • Enhances the performance of your fireplace or wood stove
  • Keeps harmful gases like carbon monoxide out of your living space

And it’s not just creosote. Leaves, animal nests, and soot can block airflow and create serious ventilation problems. A well-maintained chimney is your first defense against smoke and toxic gas buildup.

Must-Have Tools for DIY Chimney Cleaning

Before you start, gather the right gear. Here’s your essential chimney cleaning toolkit:

  • Chimney brush (matched to your flue size and shape)
  • Extension rods (compatible with your brush)
  • Drop cloths/plastic sheeting (to protect flooring and furnishings)
  • Duct tape (for sealing the fireplace opening)
  • Shop vacuum (to remove debris and ash)
  • Ladder (roof access if using the top-down method)
  • Safety gear (goggles, gloves, dust mask)

Having the right tools ensures a safer, cleaner, and more effective job.

Step-by-Step Chimney Cleaning Made Simple

1. Prep Like a Pro

Set yourself up for success:

  • Measure the height and shape of your chimney
  • Select the correct brush and rods
  • Lay down protective coverings
  • Seal the fireplace opening
  • Gear up with safety equipment

2. Scrub It Out: Top-Down or Bottom-Up?

Two tried-and-true methods—pick the one that suits you best:

Top-Down Method

  • Climb to the roof safely
  • Remove chimney cap
  • Insert brush and scrub with steady up-and-down strokes
  • Add rods as you go until you reach the bottom

Bottom-Up Method

  • Stay indoors
  • Insert the brush through the fireplace
  • Scrub upward, extending rods as needed
  • Stop when the brush reaches the top

Tip: The top-down method tends to be more thorough, but the bottom-up method is safer if you’re not comfortable on a roof. A professional

ventilation issues

can detect structural issues that most homeowners would miss.

Finishing Touches and Cleanup

After scrubbing:

  • Let the dust settle
  • Carefully remove the plastic sheeting
  • Vacuum up debris
  • Reattach the chimney cap (if removed)
  • Dispose of creosote and ash responsibly (check your local regulations)

Bonus Tips for Chimney Cleaning Success

  • Clean your chimney once a year, ideally before peak fireplace season
  • Burn only seasoned hardwood to reduce creosote buildup
  • Inspect for cracks or damage during each cleaning
  • Install a chimney cap or mesh screen to keep critters out
  • Add a carbon monoxide detector in your home for added peace of mind

When to Call a Chimney Cleaning Pro

Sometimes, DIY isn’t enough. Call a certified chimney sweep if:

  • You see thick creosote or a tar-like glaze
  • It’s been over a year since the last cleaning
  • You’re not comfortable on a roof or handling tools
  • You suspect chimney damage

Pros have the tools and training to catch issues you might miss—and they’ll give your chimney a clean bill of health. Keeping up with

chimney sweep

is one of the simplest ways to prevent costly chimney repairs.

FAQ: Chimney Cleaning

How often should chimneys be cleaned?
At least once a year, or more if you use your fireplace regularly.

Is chimney cleaning messy?
It can be—but with proper prep, it’s manageable.

Can I clean my chimney from indoors?
Yes, the bottom-up method lets you clean without going on the roof.

What happens if I skip cleaning?
Skipping chimney cleaning increases the risk of fire, poor ventilation, and CO poisoning.

How much does professional cleaning cost?
Between $100–$300, depending on your area and chimney condition.

Chimney Cleaning Checklist

Use this to stay on track:

✅ Gather tools and safety gear
✅ Measure chimney height and shape
✅ Choose top-down or bottom-up method
✅ Protect your floors and seal the fireplace
✅ Scrub the flue thoroughly
✅ Clean firebox and surrounding area
✅ Inspect for damage or blockages
✅ Reattach chimney cap
✅ Dispose of creosote and debris safely
✅ Schedule next annual cleaning